
I’ve never done Kumihimo before, but my daughter had a foam kumihimo disk, and I had a need for something to tie my new coat. After a little investigation online, I decided on the half-round braid.
 First step was to prepare the materials. I had a lot of thrums, the waste fibers from when I cut the length of Rivermoor trim I made Kupe off the loom. The pieces were quite long, and all shoved into a bag. So I spent one fighter practice just untangling 4 long pieces of the size 10 crochet cotton, two blue and two white. (It is quite convenient that the colors for Rivermoor are the colors for my personal heraldry.) I attached each end of the long thrums to the center of a wooden clothes pin, and found the center. I tied a knot to mark the center, and wound up all the length around my clothespins.
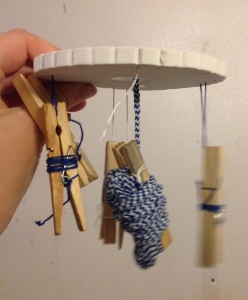
 I retied the center knot for all four cords together, and placed it through the center of the disk, then looped around another wooden clothes pin. The blues were placed top and bottom, while the white were on each side. This gave me a cord that had alternating V-shapes in blue and white – similar to the water of the rivers of Rivermoor. A small bag of coins was hung on the center clothes pin as a tension device – I had to pour some of the coins out, to make it not too heavy.
 I was happy to learn, as I followed the instructions (and talked to friends), that it is pretty easy to look at the disk, and figure out where you are. Slight errors show up quite quickly, and are easy to back up. That’s quite a change from doubleface tabletweaving, where mistakes can be excruciatingly difficult to fix. It is also pretty easy to start and stop, which was a bonus as I worked on this during several events that weekend.
Weaving went pretty quickly at first it seemed. At one point, the bag of coins and the woven cord was getting too heavy – so I thought I could forego the bag of coins. After about 1 inch woven, I realized the lack of sufficient weight was allowing the cord to become lumpy, rather than smooth. I added my car keys to bring the weight back up to standard. When I enter this in competition, I’ll mark that section with a paper clip, so the judges know I’m already aware of the issue, and what the fix was.
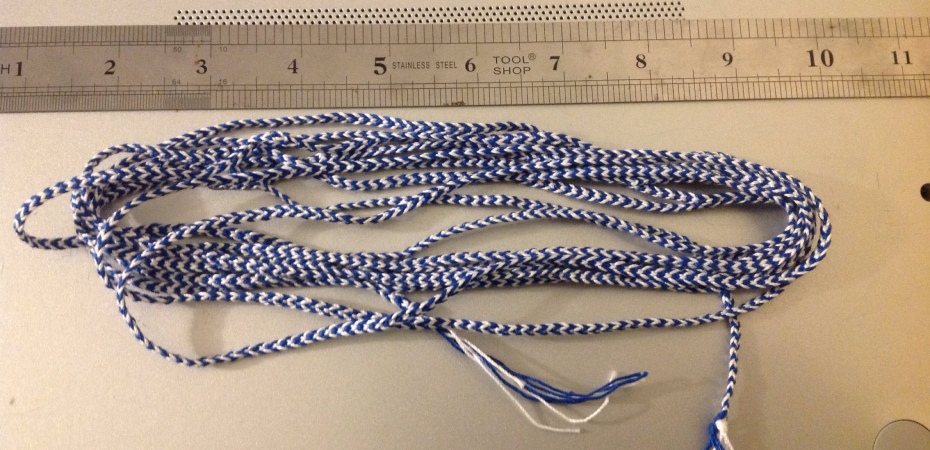
Luckily, that short bobble in the tension isn’t going to ruin the overall utility of the cord. I’ll be cutting this in pieces to use for loops and closures on the new coat I am making.
As I keep weaving, I’m starting to wonder how long those unmeasured thrums were? I did a test, working continuously during an entire cheery christmas movie, I wove 38 centimeters in 100 minutes. I know that I have seriously underestimated the time others have taken, when they have used kumihimo cords to assemble armor and other uses.
 Finally, I got to the end of the thrums. Since this was waste from another project, I couldn’t bring myself to cut it early. When it was getting close, I had to untie the crochet cotton from the clothes pin weight. That resulted in a little bit of tension bobbles. I turned to YouTube, so I could watch some Die Hard for my Christmas Eve, and watching the clips, I did make one mistake in the weaving. Oh well, it still is useful as cording.
Final length was 11.5 feet. This cord is slightly springy, with 6 inches stretching to 6.5 inches.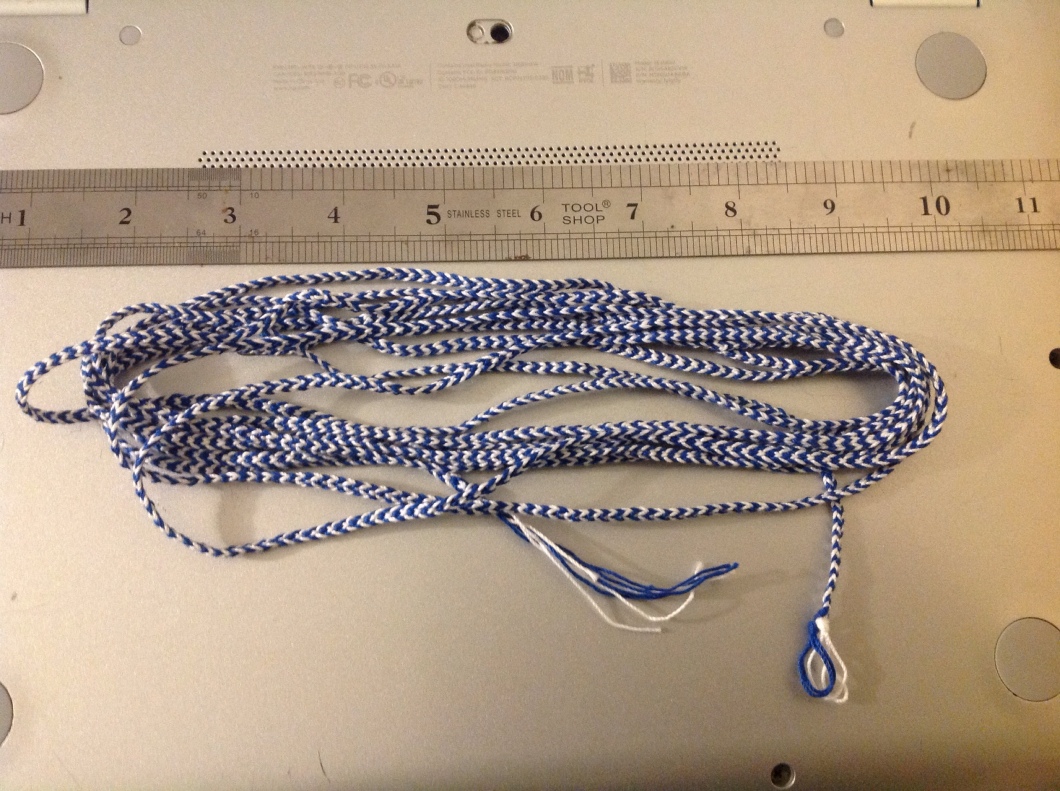

[…] Kumihimo cord – Construction – Score 5 & 3.25 = 4.125 […]
LikeLike
[…] Kumihimo – Score 3.58333 […]
LikeLike